

All-in-one-piece weaving projects done with make-it-up-as-I-go-along methods.
Monday, 28 November 2011
Friday, 11 November 2011
Pebble theme continued
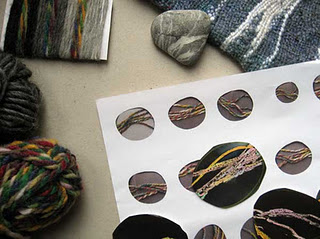
To continue the pebble theme and explore more meandering weft, I started a set of coasters. They are done with wool so they can be felted in the washing machine after weaving. I had a lot of fun making some pebble-shaped "sketches" with two methods: shapes cut out of a sheet of stripes in crayon and ink; and photographs of yarn against dark paper cropped with a pebble-shaped frame.
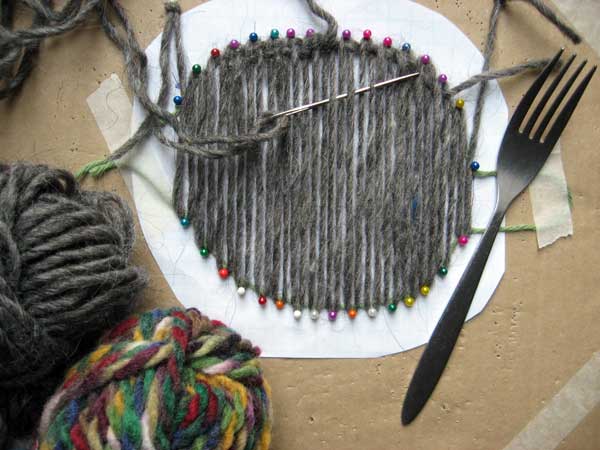
The weaving is done on a "pin board" (stack of cardboard).

Monday, 3 October 2011
Pebble Bag Weaving Complete
 |
| back of bag and flap |
 |
| front of bag with flap closed |
Friday, 9 September 2011
Pebble bag continued
 |
| Flap and back of bag with sketch beside |
 |
| Front of bag with the main line of white just finished and reverse of sketch beside |
Thursday, 1 September 2011
Beginning to weave the "pebble" bag

I've finally begun to weave the bag. I keep the inspirational pebble close at hand while weaving freeform meandering weft in a variety of greys and a bright white. Every weft is made up of three strands to keep the texture and colours rich.The greys are all done in even weave, but the white has a combination of even weave and rows of "over two, back under one" stitch to increase the intensity.
Thursday, 25 August 2011
Plaiting on holiday

We were on holiday and I wanted something to do while on the airplane and lounging by the pool. So I had fun experimenting with different colours while I plaited some straps and cords from cotton yarn. I found the instructions for these straps in the book Time to Weave by Jane Patrick. She gives great step by step illustrations and projects to make as well.
Here is a quick summary of the instructions:
For the 8 strand cord hold 4 strands in each hand. Take an outside strand from one side. Move it under 5 and back over 2 strands. It becomes the inside strand on the same side it started from. Repeat on alternate sides. Keep alternating this movement.
For the 9 strand strap start with 4 strands in one hand and 5 in the other. Take the outside strand of the group of 5. Move it over 2 and under 2 and put it in the other hand. It becomes the inside strand of the group. Repeat with the outside strand of the group that now has 5. Keep alternating this movement.
Friday, 5 August 2011
Pebble bag

My daughter brought me back a beautiful grey and white striped pebble from her holiday. It has become the inspiration for a larger wool bag that I intend to felt. I gathered up the materials and did a little sample to start with.

Now I am in the process of warping. The sides are done ...

...and I'm warping the ends and weaving the bottom at the same time. The oval shape is a bit tricky at this stage, but once the bottom is complete, it should be straightforward from there.
Thursday, 4 August 2011
Bags and more bags

I'm perfecting the technique and trying variations of design and colours. A few are completely finished.

I have a series of felted bags. Recyled silk from an old blouse, hand-stamped with fabric paint will be the linings for these.

There are a number of miscellaneous experiments which are woven and have the linings in process.
Saturday, 9 July 2011
2 Prom bags


Sunday, 26 June 2011
Friday, 10 June 2011
Little bags
 |
| first samples to test size |
 |
| more samples with options for linings |
 |
| the current project with the materials |
 |
| the next plan with colour and button option |
Subscribe to:
Posts (Atom)