Sunday, 12 February 2012

Making a rigid heddle

A rigid heddle needs to be threaded as you warp the loom, right? What if there were one that you could attach to the warp AFTER the warp is wrapped on the loom?* 

I came up with an idea for a rigid frame with wire heddles that opens at the top. The eye in the heddle is a coil instead of a closed loop. I can slip the thread into it with a special twist. Then the frame closes for weaving. The prototype is made with cardboard but I plan to make a wooden frame for the next one and am learning to bend the wires much more precisely. To test the prototype I wrapped a continuous warp around a biscuit box. I anchor the box between my knees to weave.

My first two tests were warp faced bands, one of heavy yarn and one of shiny finer thread. The heddles performed better with the heavy yarn, I had lots of trouble with the finer thread getting caught when it tried to slide past the eye, especially on the outside edges of the band. 
The current test is heavy yarn in even weave. This test works more easily than the warp faced bands, perhaps because the outside threads don't have to pull in so much. I will go ahead and refine the design for the wooden frame version. I picture it being useful for weaving bands on an inkle loom or wider fabric on a backstrap loom.


*Note: There is an open-topped heddle for the Brinkley loom. It has a heavy rod heddle with slits in which you lay the warp threads. Turning the heddle over changes the shed which is very ingenious. (I've seen this in use at a demonstration at Wool Fest from this company http://plantdyedwool.co.uk/)

Monday, 28 November 2011

Friday, 11 November 2011

Pebble theme continued

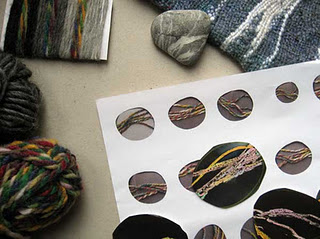
To continue the pebble theme and explore more meandering weft, I started a set of coasters. They are done with wool so they can be felted in the washing machine after weaving. I had a lot of fun making some pebble-shaped "sketches" with two methods: shapes cut out of a sheet of stripes in crayon and ink; and photographs of yarn against dark paper cropped with a pebble-shaped frame.
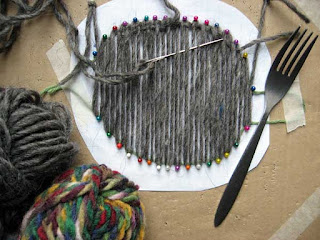
The weaving is done on a "pin board" (stack of cardboard). 
I'm experimenting as I decide what method I want to use for the contrasting stripes and as I sort out how to make the edges beautiful. The coaster on the right is one of the first and shows how much shrinkage happens in the felting process. The ones on the left haven't been felted yet.

Monday, 3 October 2011

Pebble Bag Weaving Complete

back of bag and flap
By the end of the weaving I had found my way in meandering weft, how to switch colours and how to keep control of the shapes. To full and slightly felt the bag, I put it into the washing machine. It tightened up and has a really lovely feel. I'll make the lining next.
front of bag with flap closed

Friday, 9 September 2011

Pebble bag continued

Flap and back of bag with sketch beside
I finished weaving the flap and now am weaving around the body of the bag. After I created the design on the flap based on the pebble, I needed to design the rest of the bag to belong with it. I made a shaped sketch to follow. I've just woven a line to establish the main line of the white design around the bag and next will I fill in on both sides of it.
Front of bag with the main line of white just finished
and reverse of sketch beside

Thursday, 1 September 2011

Beginning to weave the "pebble" bag

I've finally begun to weave the bag. I keep the inspirational pebble close at hand while weaving freeform meandering weft in a variety of greys and a bright white. Every weft is made up of three strands to keep the texture and colours rich.The greys are all done in even weave, but the white has a combination of even weave and rows of "over two, back under one" stitch to increase the intensity.

Thursday, 25 August 2011

Plaiting on holiday

We were on holiday and I wanted something to do while on the airplane and lounging by the pool. So I had fun experimenting with different colours while I plaited some straps and cords from cotton yarn. I found the instructions for these straps in the book Time to Weave by Jane Patrick. She gives great step by step illustrations and projects to make as well.
Here is a quick summary of the instructions:
For the 8 strand cord hold 4 strands in each hand. Take an outside strand from one side. Move it under 5 and back over 2 strands. It becomes the inside strand on the same side it started from. Repeat on alternate sides. Keep alternating this movement.
For the 9 strand strap start with 4 strands in one hand and 5 in the other. Take the outside strand of the group of 5. Move it over 2 and under 2 and put it in the other hand. It becomes the inside strand of the group. Repeat with the outside strand of the group that now has 5. Keep alternating this movement.